Version 1.5.0 · every threshold stated
Everything the toolkit measures, and what each number rests on.
This page covers the capture pipeline, the eight-zone iris map, every measurement with the band it is graded against, the overlays and research tools, and the four therapy modules.
It is taken from the manual that ships inside the app, so the page and the software say the same thing. Where a reading has a limit, the limit is printed rather than described.
Capture
The right eye is captured first (OD), then the left (OS) — the standard clinical iridology order. Both images must exist before analysis will run, and the source is chosen independently for each eye.
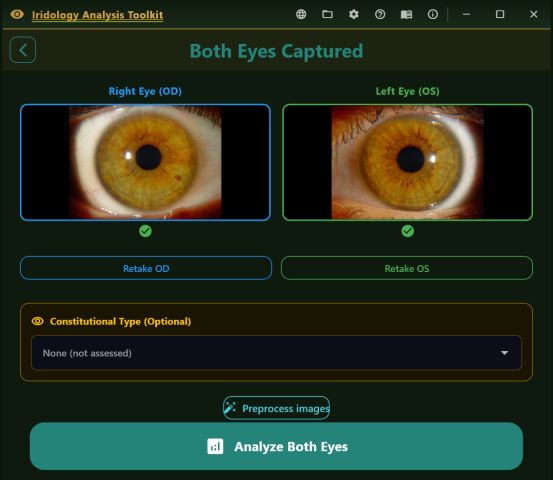
Six ways in
| Source | Best for |
|---|---|
| Gated rear camera | Phone or tablet, with an automatic sharpness and exposure gate |
| Gated front camera | Selfie capture on mobile |
| Manual camera | Direct shutter control, macro-lens attachments |
| USB / UVC iriscope | Dino-Lite AM4115ZT and compatible professional scopes |
| PLR video mode | Pupillary light reflex, analysed from video |
| Gallery import | Re-analysing an archived photograph |
Imported images are copied into a folder the toolkit manages, so the original file on disk is never modified.
| Criterion | Accepted | What it catches |
|---|---|---|
| Sharpness | score ≥ 100 | Motion blur, an out-of-focus iris |
| Brightness | 30 – 230 of 255 | Under- and over-exposure |
| Contrast | score ≥ 30 | Flat, low-detail images |
| Pupil confidence | ≥ 30% | Frames with no detectable pupil |
| Centre offset | ≤ 25% of frame | A pupil too far off centre to measure decentration from |
A red border and a live message mean one or more criteria are failing; amber means borderline; green means all five are met and the photograph is taken for you. A separate check rejects captures that are not an eye at all, and it runs in manual mode too.
Lighting
Diffuse and even — the iriscope LED ring is ideal. Keep reflections off the cornea near the pupil border; a slight reposition removes most of them. Avoid hard shadows across the iris.
Distance & framing
The iris should fill at least half the frame width and sit centred; a pupil near the edge costs you decentration accuracy. For a Dino-Lite the working distance is roughly 2–3 cm.
Stability
Brace the device or your hand. Ask the patient to fixate on a distant point. Capture between blinks — the gate rejects blink frames on its own.
The eight-zone iris map
The iris is divided into eight zones by clock position. Findings are reported by zone name rather than raw clock hour, because the same organ association sits at different hours in the two eyes — so the map is the key to reading any result.
| Zone | Right eye (OD) | Left eye (OS) | Historical associations |
|---|---|---|---|
| Upper-Central | 12 o’clock | 12 o’clock | Mood regulation, energy patterns — both eyes |
| Upper-Nasal | 1 o’clock | 10–11 o’clock | Cognitive zones, cervical spine reflexes |
| Middle-Nasal | 2–3 o’clock | 9 o’clock | OD: oxygen utilisation, cardiac/respiratory · OS: neurological, cardiac |
| Lower-Nasal | 4–5 o’clock | 7–8 o’clock | Urogenital, pelvic and lumbosacral zones |
| Lower-Basal | 6 o’clock | 6 o’clock | OD: renal, lower extremity · OS: renal, eliminative |
| Lower-Temporal | 7–8 o’clock | 4–5 o’clock | OD: hepatic, metabolic · OS: cardiac, splenic |
| Middle-Temporal | 9 o’clock | 3 o’clock | OD: cardiac regulation · OS: pulmonary, cardiac |
| Upper-Temporal | 10–11 o’clock | 1–2 o’clock | OD: cranial nerve, auditory · OS: neurovegetative, speech |
These correspondences come from the historical iridology literature and the CNRI reference charts. The toolkit measures where a deviation falls and names the zone; it makes no claim to have tested what the zone means. See the limits.
Pupil measurements, and the bands behind them
Every band below is half-open — the lower bound is included, the upper excluded — so a measured value maps to exactly one label and a boundary value is never ambiguous.
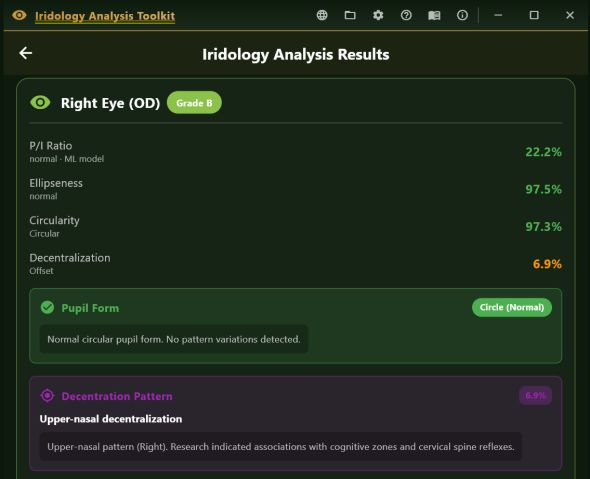
P/I ratio
The pupil diameter as a percentage of the iris diameter, both measured in the same image — so the figure is independent of how close the camera was.
| P/I ratio | Label |
|---|---|
| < 15% | Miosis — very constricted |
| 15 – 19.9% | Constricted |
| 20 – 29.9% | Normal for an adult in standard indoor light |
| 30 – 39.9% | Dilated |
| ≥ 40% | Mydriasis — very dilated |
| Age group | Expected diameter | Research range |
|---|---|---|
| Infant (< 1 yr) | 2.2 mm | 2.0 – 2.5 mm |
| Child 1–5 | 4.0 mm | 3.5 – 4.5 mm |
| Child 6–11 | 4.3 mm | 3.8 – 4.8 mm |
| Teen (12–19) | 4.2 mm | 3.5 – 5.0 mm |
| Adult 20–39 | 3.5 mm | 3.0 – 4.2 mm |
| Adult 40–59 | 3.0 mm | 2.5 – 3.5 mm |
| Senior (60+) | 2.7 mm | 2.3 – 3.2 mm |
Pupil size falls with age, so a flat adult threshold misreads both ends of the range. The millimetre figure is a conversion from the ratio using an assumed iris size for the age band — the ratio is the measurement, and the millimetres are the interpretation of it.
| Severity | Deviation | Meaning |
|---|---|---|
| Within limits | 1.5 – 2.9% | Minor variation, not clinically flagged |
| Mild | 3.0 – 5.9% | Notable deviation, noted for observation |
| Moderate | 6.0 – 9.9% | Significant deviation, worth follow-up |
| Significant | ≥ 10.0% | Strong deviation, primary focus |
FLAT is a pupil margin curving inward at a zone; PROT is a margin bulging outward. Deviations below 1.5% are not reported at all, so the results screen is not padded with noise.
Decentration
How far the pupil centre sits from the iris centre, as a percentage of iris radius. Under 5% is normal; at 5% or above the finding is flagged and the direction is named — Nasal, Temporal, Frontal, Basal, Upper-nasal or Upper-temporal — with the angle reported in degrees.
Each named pattern carries its historical zone implication, which differs between OD and OS for several of the directions.
Ellipseness and pupil form
The minor axis as a percentage of the major axis: 100% is a perfect circle, and 95% is the threshold. Below it, the ellipse orientation is classified into a form type — horizontal oval, vertical oval, diagonal oval, chord-like, or irregular.
Because ellipseness describes the pupil as a whole, it cannot see a single flattened side. That is what the zone findings are for, and the two are read together.
| Difference | Severity | Note |
|---|---|---|
| < 2% | None — within normal limits | Physiologically symmetric |
| 2 – 3.9% | Mild | May be physiological; monitor |
| 4 – 7.9% | Moderate | Notable asymmetry; TBI flag raised |
| ≥ 8% | Severe | Significant asymmetry; TBI flag raised |
Exactly 4% is Moderate, not Mild — that boundary is where the TBI indicator turns on. The flag is a research observation reference carried into the report, not a diagnostic finding. Pupils also react to light, so uneven illumination between the two captures can produce a difference on its own.
The collarette, and the Velchover wizard
The autonomic nerve wreath — the collarette — is the textured ring about a third of the way out from the pupil, marking the boundary between the inner and outer iris.
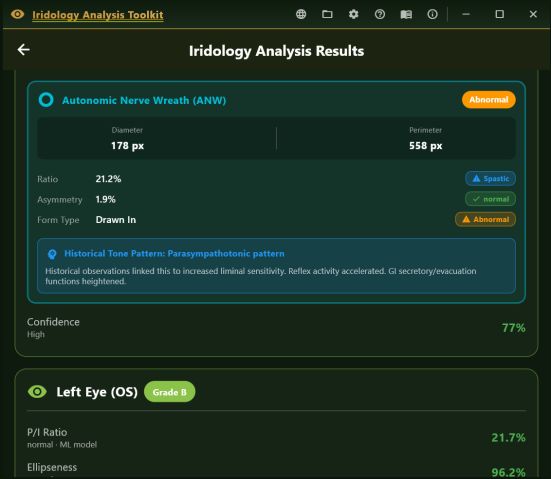
| Ratio | Status | Autonomic reading |
|---|---|---|
| < 25% | Spastic | Ring contracted inward — sympathetic dominance |
| 25 – 35% | Normal | Balanced tone |
| > 35% | Atonic | Ring expanded outward — parasympathetic dominance |
Asymmetry between the two eyes is measured as well. Up to 5% is normal. A larger gap — particularly one eye Spastic against the other Atonic — is flagged as a Functional Frustration pattern.
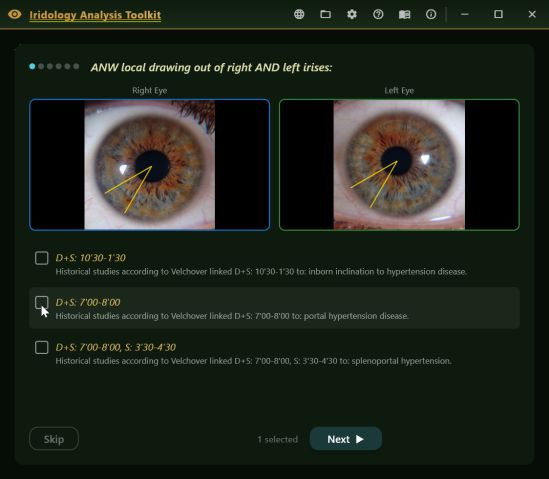
Geometry suggests, you confirm
After analysis, a six-page wizard walks through the Velchover ANW pattern catalogue. Patterns whose geometric signature matches the detected sector deviations arrive pre-ticked — and that is all they are.
Only patterns you review and confirm are written into the record, the results screen and the PDF. Tapping Skip on the first page records nothing: no auto-suggested pattern is ever committed on its own.
The amber ring drawn over the iris is an estimated collarette position — pupil radius plus 15% of the iris radius — serving as a visual guide for the wizard. A true edge-detected tracing is not yet implemented, and the toolkit says so rather than implying a precision it does not have.
Confidence, and which engine produced what
Two independent pipelines run on every image, and their outputs are fused into one confidence score. Which one owns which number matters, so the toolkit is explicit about it.
Classical CV — pixel-based
Circle detection, radial sampling and boundary-point analysis on the full-resolution image, producing pixel-accurate iris and pupil boundaries.
Zone findings, ANW, decentration and ellipseness come from here alone.
ML model — ONNX
A neural network over a normalised 224×224 crop centred on the detected iris. It outputs one validated regression value: the P/I ratio, at R² = 0.856 and MAE 1.17% over 712 Bexel eyes.
The ML PI Agreement figure in the PDF reflects P/I agreement only. It does not validate decentration or ellipseness, and it is not presented as though it does.
Confidence is about the detection, not the finding
The per-eye grade describes how sure the toolkit is that it found the right boundaries — not how serious a finding is. A high-confidence reading of a normal iris and a high-confidence reading of a marked deviation are both simply well-detected. Where the two engines disagree, the grade falls.
Eight historical chart overlays
The major published iridology charts, fitted to the limbus and pupil of the iris you actually captured rather than to a generic circle.
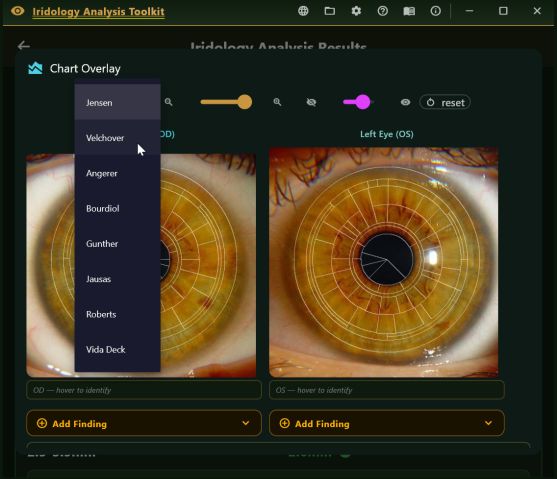
- Jensen
- Velchover
- Angerer
- Bourdiol
- Gunther
- Jausas
- Roberts
- Vida Deck
Each author has a separate OD and OS chart, so the mirrored organ layout of the two eyes is handled properly rather than flipped by approximation.
A chart-fit warp can bend the overlay onto an iris that photographs as an oval, and an auto-centre fits it to the detected limbus. Hover any zone to identify it; the organ names are translated into 15 languages, so the overlay speaks the same language as the rest of the interface.
The overlay panel also carries a live metrics readout — P/I ratio, ellipseness, decentralization and confidence — so you can watch the figures as you align.
Iris Sign Finder
A structured way to record what you see in a zone, rather than typing it free-hand into a notes box and hoping it reads the same next visit.
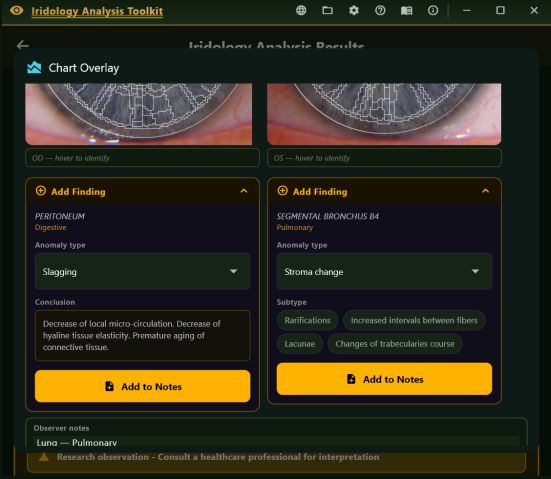
Pick the zone, then the sign
Hovering the chart overlay identifies the zone and its organ system. From there you choose an anomaly type and, where one applies, a subtype:
- Stroma change
- Organic pigment spot
- Slagging
- Toxic radii
- Heterochromia
- Scurf rim
- Adaptive rings / arcs
- Autonomous wreath anomaly
The toolkit assembles a written conclusion for the combination you chose, in the current language. Add to Notes appends it to the observer notes, which are carried into the PDF and the text report — so the phrasing is consistent between practitioners and between visits.
Visual analysis tools
Overlays and enhancements that live on the analysis screen as chips, each computed on demand and cached for the session.
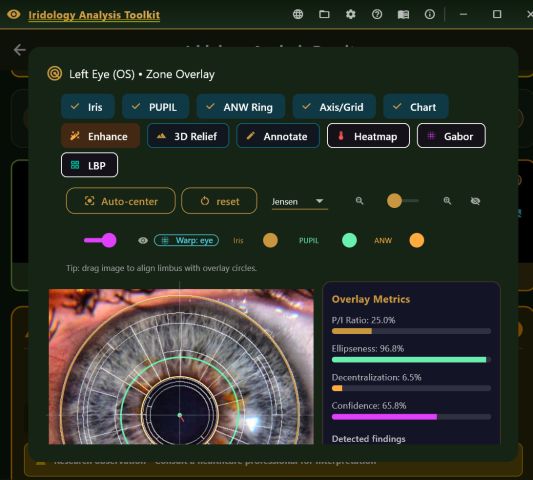
Every layer on its own switch
Iris outline, pupil outline, the ANW ring, an axis grid and the chart each toggle independently, so you can build up exactly the view you want and drop the rest.
The same bar carries the enhancement and texture tools below. Auto-centre fits the overlay to the detected limbus, Warp: eye bends it onto an iris that photographs as an oval, and dragging the image aligns it by hand when you would rather do it yourself.
3D relief
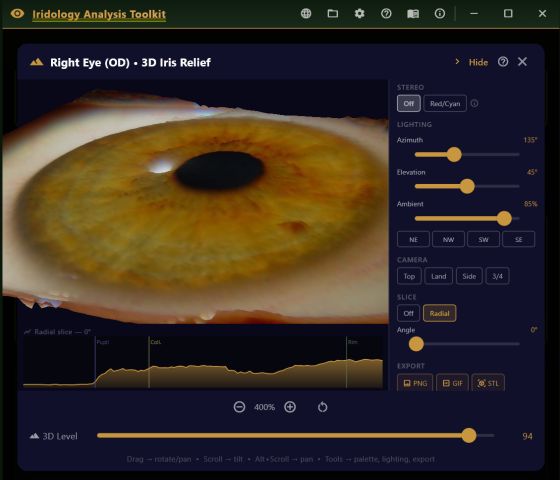
Luminance becomes elevation: raised fibres, tophi and projections read as high ground, crypts and lacunae as valleys. The image is downsampled to 512×512 and built into a 128×128 triangle mesh, textured with the original photograph so the pigmentation survives into 3D.
Azimuth, elevation and ambient lighting are adjustable, with fixed camera presets, an optional red/cyan stereo mode, and a radial slice that cuts a profile from pupil to rim.
CLAHE enhancement
Contrast-limited adaptive histogram equalisation, equalising in small overlapping tiles rather than globally. It lifts crypts, fibre texture, lacunae and zone boundaries out of a washed-out capture without blowing out the bright regions. Runs on a background isolate, so the interface stays responsive.
Pigment density heatmap
A thermal scale replaces the natural iris colour — dark blue through cyan, green, yellow and orange to red — mapping where pigment concentrates. Useful for heterochromia sectors and ciliary zone darkening that are easy to miss in normal colour.
Annotation
Draw freehand on the iris to circle a region, mark a lacuna or trace the collarette, with undo and clear. Save PNG writes a flat composite of the photograph and your strokes, named for the patient and the date.
Gabor texture
A bank of 2-D Gabor filters across four scales and several orientations, summed into an energy map where fibres, striae, radial sulci and tophi edges appear as bright ridges. The canonical texture operator in iris analysis, and configurable in settings.
LBP stroma classifier
A uniform rotation-invariant Local Binary Pattern descriptor over the stroma, shown as a colour-coded texture map and a histogram. Rotation-invariant, so the orientation of the iris at capture does not change the descriptor.
Serial timeline
From any history record, a longitudinal chart plots up to six series across every scan on file for that patient — OD and OS P/I ratio, ellipseness and confidence — each toggled independently.
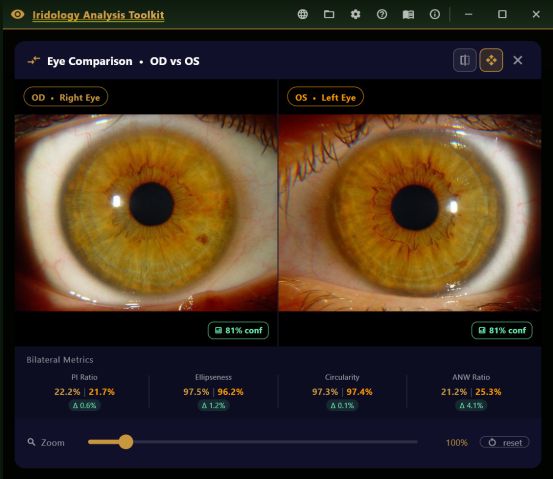
Side-by-side comparison
Both irides in zoomable panels with the bilateral metrics underneath — the fastest way to judge symmetry, asymmetric pigmentation and a difference in collarette position.
Mirror OD flips the right eye so both irides sit with the nasal side inward, which is the standard bilateral orientation. Sync Pan ties the two panels together so a gesture on one is mirrored on the other.
Advanced Iris Research Toolkit
Ten specialised tools in a dedicated full-screen workspace, marked research only throughout. Routine clinical use of the toolkit does not require any of them.
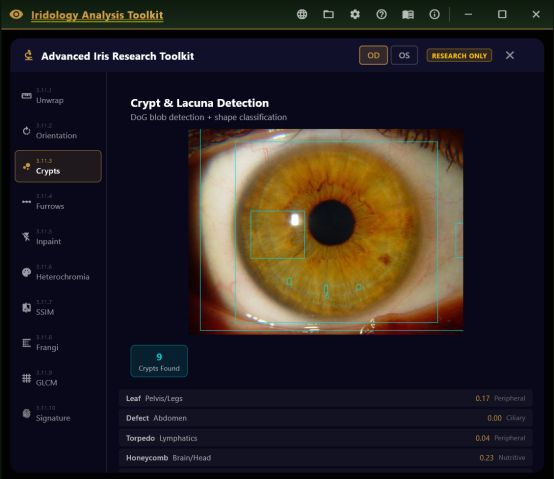
| Tool | What it does |
|---|---|
| Unwrap | Rubber-sheet unwrapping to polar coordinates |
| Orientation | Radial fibre orientation map and mean coherence |
| Crypts | Crypt and lacuna detection with shape classification |
| Furrows | Contraction furrow detection and ring count |
| Inpaint | Specular reflection inpainting |
| Heterochromia | Heterochromia sector mapping |
| SSIM | Bilateral structural similarity, OD against OS |
| Frangi | Frangi vesselness — fibre ridges, coverage and width |
| GLCM | Haralick texture panel |
| Signature | Iris signature and session verification |
How to read anything this produces
Texture metrics are device-dependent. Gabor, LBP, GLCM and Frangi all compute from pixel intensity and gradient, so lighting, white balance and the camera itself move the numbers. Interpret them longitudinally within the same patient on the same device; cross-device and cross-practitioner comparison needs a calibration the toolkit does not perform.
Automatic detections are suggestions. Crypts, contraction furrows and heterochromia sectors are algorithmic proposals, not clinical findings, and every one should be visually verified before it is relied on.
Constitutional iridology
Where topographic iridology maps zones to organs, constitutional typing reads the iris as a whole — fibre texture, pigmentation and structural quality — for a picture of baseline reactivity and long-term susceptibility.
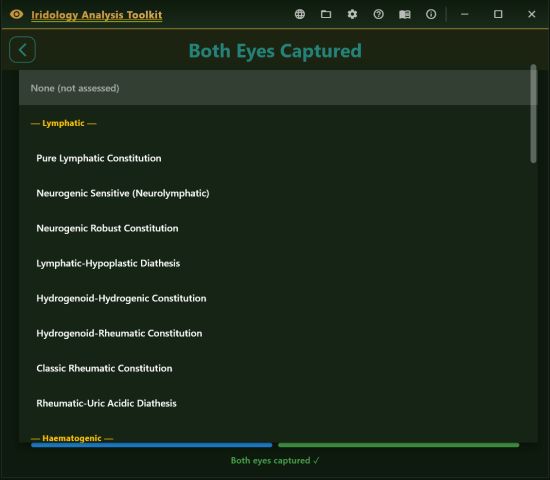
34 types in six groups
- Lymphatic
- Haematogenic
- Biliary / Mixed
- Pathological
- Pre-Cancerous
- Syndrome
The system originated with Dr Josef Deck, who grouped recurring iris structural patterns into constitutional categories, and was developed further by Professor Sergei Velhover and others in the European and Soviet traditions.
Selection happens on the Both Eyes Captured screen, because Deck's system requires both irides to be evaluated together — so the toolkit asks at the moment the pair is on screen, not before and not after.
Choosing a type adds a panel to the results with three collapsible sections: the full iris description, the health predispositions associated with the constitution, and the homeopathic remedies with constitutional affinity for that type, from the CCVE research base.
Training required, and not a diagnosis
Accurate constitutional typing needs formal iridology training; practitioners unfamiliar with the system should complete it before using this feature clinically. Constitutional patterns describe inherited tendencies, not diagnoses — a patient with a cardio-pathological constitution has a structural predisposition, not heart disease. The remedy affinities are traditional German homeopathic-iridology correlations, provided for educational reference only.
Four natural-medicine modules
Every module is off by default and toggled independently in settings. A disabled module produces no panel and no PDF section. An enabled one appears only when the analysis actually finds a qualifying zone finding.
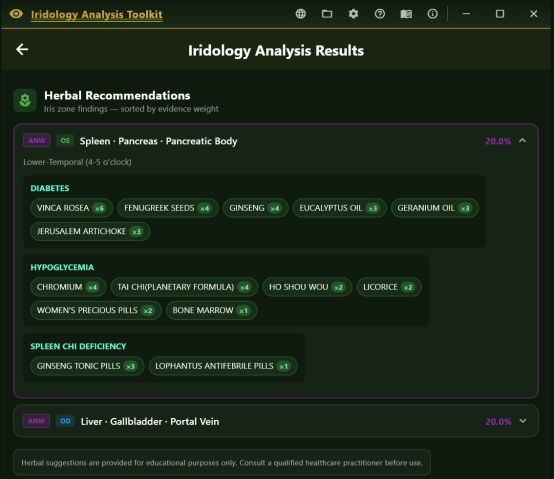
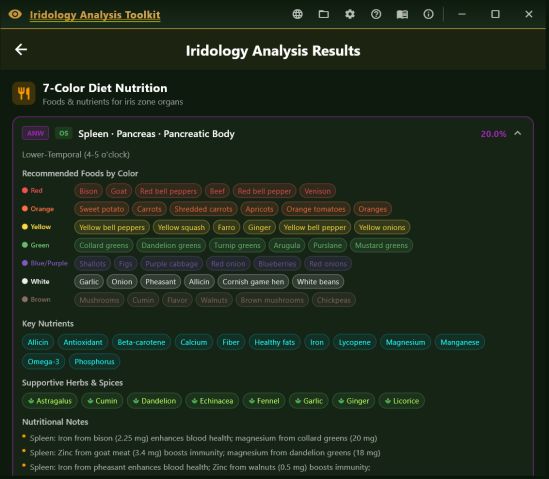
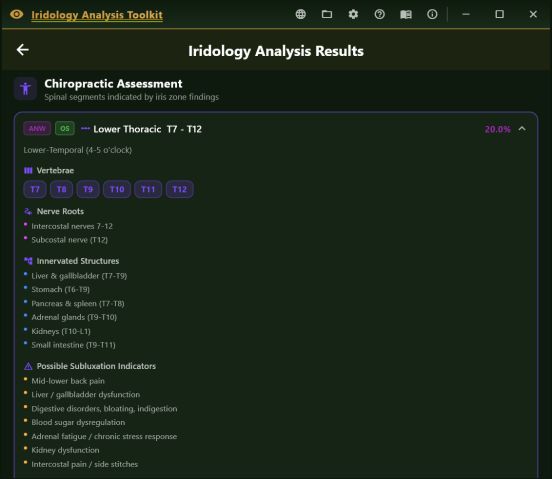
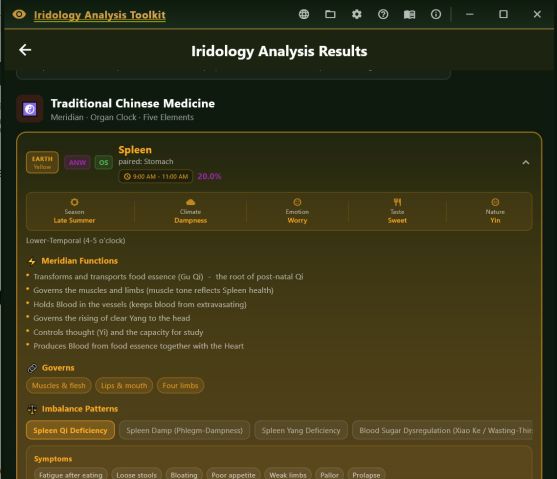
Each panel carries its own disclaimer — into the PDF as well
Herbal: for educational purposes only; consult a qualified healthcare practitioner before use. Chiropractic: educational; consult a licensed chiropractor for diagnosis and treatment. TCM: educational; consult a licensed acupuncturist or TCM practitioner. Nutrition: the 7-Color Diet is an educational framework, and individual needs vary — consult a registered dietitian.
Herb–drug interactions exist. No herbal suggestion should be acted on without first reviewing the patient's current medications and medical history with a qualified practitioner.
History, reports and settings
Scan history writes itself
Every completed analysis is saved to a local database the moment the results screen finishes loading — there is no save action to forget. Open it with Ctrl + H on Windows, or the history button on the results screen anywhere.
Each record holds the patient details and complaints, the timestamp, the paths to both images, the full result for each eye, the anisocoria and age-norm results, and the PDF path. Any record can be reopened in full or have its report regenerated.
PDF and plain text
The PDF is assembled on the device and saved to Documents, or shared straight to another app on mobile. Both eye photographs sit side by side on page one unless you turn images off for a smaller, text-only document, and your clinic name appears in the header banner on every page.
The text report carries identical clinical content — every metric, the full ANW parameters, the age-normalised comparison, anisocoria, research observations and your observer notes — formatted for pasting into an EHR or an email. It omits the photographs and the therapy sections.
The report follows the language
Section headings, metric labels, status labels and finding descriptions are all generated in whichever language the app is set to at the moment you export.
Auto-save, if you want it
Off by default. Turned on, the PDF is written at the end of every analysis without a tap — useful for a clinic that files every scan as a matter of course.
Keyboard, on Windows
F11 toggles fullscreen, Ctrl + H opens scan history, Escape goes back or closes a dialog. Settings and the clinic name are reachable from the title bar on any screen.
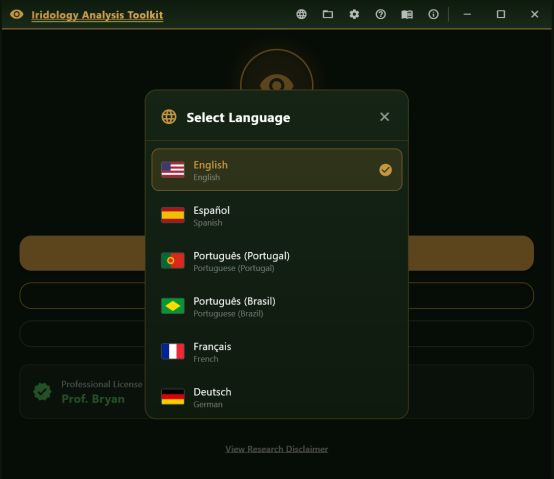
18 languages, 20 locales
Not just the buttons: the clinical wording, the finding descriptions, the chart organ names, the built-in manual and the generated PDF all follow the language you pick.
- English
- Español
- Português
- Português BR
- Français
- Deutsch
- Italiano
- Nederlands
- Svenska
- Polski
- Română
- Русский
- Türkçe
- العربية
- हिन्दी
- Bahasa Indonesia
- 日本語
- 한국어
- 中文
- 中文 TW
Brazilian Portuguese and Traditional Chinese are maintained as separate locales rather than folded into their parent language, because the clinical vocabulary genuinely differs.
Limits worth reading before you draw conclusions
What this is
The Iridology Analysis Toolkit is a research and educational tool for licensed practitioners trained in iridology, natural medicine or a related field. It is not a medical device and has not been approved, cleared or certified by the FDA, CE, TGA or any equivalent authority for diagnostic use in any medical context.
Every output — P/I ratio, ellipseness, decentration, zone findings, ANW assessment, anisocoria, age-normative comparison, hybrid confidence score and all therapy panel content — is observational and educational. It is not a diagnostic conclusion, not a substitute for clinical examination, and not intended to guide, change or replace any medical treatment. The practitioner is solely responsible for all clinical decisions made from it.
The zone associations are inherited, not tested
Zone names, organ correspondences, constitutional types and therapy mappings come from the historical iridology literature and the CNRI reference charts. Nothing in the toolkit's measurement work supports or refutes that correspondence. An accurate measurement of a flattening is not evidence of what the flattening means, and the two should be kept apart when reading a report.
A reflection can imitate a flattening
A specular highlight sitting close to the pupil border reads as a straightened edge. A warning appears on the result card, in the PDF and on the stored scan whenever a reflection falls inside the limit; the analysis still runs and no measurement is withheld. But the warning identifies images at risk, not every affected image — a reflection just outside the limit can still create a zone finding. A real deformation stays put when the light moves; a reflection travels with it.
The collarette ring on screen is an estimate
The amber ANW overlay is placed at pupil radius plus 15% of the iris radius, as a visual guide for the Velchover wizard. A true edge-detected collarette tracing is not yet implemented, and the measured ANW ratio should be read with that in mind.
Data privacy
All patient data — names, ages, scan records, images — is stored on the local device only. Nothing is transmitted to CNRI servers, to a cloud service or to any third party. Licence validation communicates the machine-generated key and activation status and no patient identifiers. You remain responsible for making local storage and exported reports comply with HIPAA, GDPR, the Australian Privacy Act or whichever law governs your practice.
Intellectual property
The iris zone reference chart and the clinical threshold data are based on Marcia's 2004 CNRI Reference Charts. The herbal database derives from CNRI knowledge base materials, and the ONNX model is proprietary to CNRI. All content © 2024–2026 CNRI; unauthorised distribution, reverse engineering or extraction of any embedded database or model is prohibited.
Try it on your own captures
The trial runs 14 days or 20 analyses, whichever ends first, with every feature above unlocked and no card required.